
How to Test a Current Transformer: WHPT-EE050-009 Continuity, DCR and Loaded-Waveform Checks | VOOHU
How to Test a Current Transformer: WHPT-EE050-009 Continuity, DCR and Loaded-Waveform Checks | VOOHU
When a prototype has no current-sense waveform, an unexpectedly low signal, or nuisance protection trips, the current transformer should not be blamed immediately. Knowing how to test a current transformer means separating the component from soldering, PCB continuity, the burden circuit, and downstream signal conditioning before deciding what has failed.
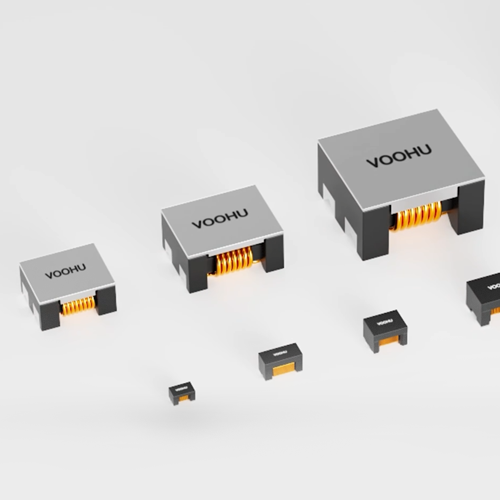
Using the VOOHUWHPT-EE050-009 current transformeras an example, a practical check covers the assembly, winding continuity, DCR, primary-current condition, and loaded waveform. This sequence can identify an open winding while avoiding unnecessary replacement when the real fault is a cracked joint, open trace, missing burden, or incorrect probe point.
1. How to Test a Current Transformer: Start with the Assembly and Primary Path
Inspect the component, solder joints, and nearby parts with power removed
Switch off the equipment and allow stored energy to discharge before making resistance checks. Inspect the transformer body, pads, and nearby components for damage, insufficient solder, bridging, lifted pads, or movement caused by mechanical stress.
If the fault appeared after vibration, a drop, or repeated rework inspect the copper and vias near the terminals as well. A fine crack between the pad and trace can create an intermittent signal even when the winding itself is intact. Continue along the secondary path through the burden resistor, rectifier, protection parts, and front-end input because an incorrectly fitted part can produce the same symptom as a failed transformer.
Confirm that primary current is actually present
A current transformer needs changing current in the primary path to produce a secondary signal. A flat output is expected if the primary circuit carries no current, the intended current path is open, or the test condition does not generate the expected pulse.
Confirm a repeatable primary-current condition before judging the transformer. Looking only at the secondary output can turn a missing input condition into a false component failure.
2. What a Winding Continuity Check Can and Cannot Prove
With power removed, an ohmmeter can be used to check whether the primary and secondary paths are continuous. This check can reveal an open winding, unsoldered terminal, broken PCB trace, or poor connection, but it cannot prove correct dynamic performance under load.
Primary continuity and very-low-resistance measurement
The WHPT-EE050-009 specifies DCR1 at 0.75 mΩ maximum. Test-lead resistance, contact resistance, and the resolution of a normal handheld multimeter can exceed the value being measured. A standard two-wire reading is therefore useful for finding an obvious open circuit, not for proving compliance with the 0.75 mΩ limit.
When a quantitative primary-DCR comparison is required, use a suitable micro-ohmmeter or four-wire Kelvin method. Keep the probe position, contact pressure, and temperature consistent. A near-zero reading on an ordinary meter indicates likely continuity, not an accurate DCR result.
Secondary continuity and in-circuit readings
DCR2 is specified at 5500 mΩ maximum, equal to 5.5 Ω. An in-circuit reading may be changed by the burden, rectifier path, protection devices, and front-end input. If the value is clearly abnormal, verify the test points and then isolate one connection in the secondary path before measuring again.
The 5.5 Ω value is an upper limit; it is not the expected reading for every acceptable product. A reading below that value also does not prove that the transformer will deliver the correct loaded waveform.
Use the continuity beeper only as a quick screen
Different meters use different beeper thresholds. A beep suggests that the measured path is not fully open, but it cannot replace a resistance measurement and will not reveal every shorted-turn or magnetic problem. Dynamic checks are still required when the signal is low or distorted.
3. How to Measure Current Transformer DCR Without a False Diagnosis
A useful DCR result begins by identifying what is actually connected to the meter. A standalone component measurement is closer to winding resistance, while an in-circuit measurement includes the effects of the surrounding network. Keep the probe position fixed and repeat the measurement; unstable readings often point to contact contamination or probe movement before they point to a winding fault.
For the sub-milliohm primary path, an ordinary two-wire meter is not a reliable quantitative tool. On the secondary side, first check for an open path, then interpret the value with the connected circuit in mind. DCR is most useful for finding opens, abnormal resistance, and connection faults. It does not reveal every shorted turn or core problem, which is why a loaded-waveform test remains necessary.
4. Current Transformer Has No Output: Check the Loaded Waveform
After continuity is confirmed, restore the complete burden and front-end path. Apply a controlled, repeatable primary-current waveform and observe the actual sampling node. The result must be interpreted together with primary current, the 1:100 turns ratio, the burden network, and the controller input rather than from one secondary terminal in isolation.
Measure the signal across the intended burden
Choose the probe points used by the real sensing circuit and keep the measurement reference consistent with the design. A point that bypasses the burden, rectifier, or filter may not show the signal received by the controller. If the reference or common-mode voltage is uncertain, use a suitable differential or isolated measurement method.
The WHPT-EE050-009 has a 1:100 turns ratio. That ratio establishes the basic primary-to-secondary current relationship, but the observed voltage also depends on the burden, front-end impedance, and signal-conditioning circuit. The ratio alone does not define one fixed output voltage.
Compare waveforms under repeatable conditions
Keep input voltage, load, switching condition, and probe points unchanged when comparing boards or a before-and-after component replacement. If the secondary signal follows controlled changes in primary current, the transformer is providing basic current transfer.
If a stable primary-current pulse is present but the secondary remains flat, continue checking the winding, solder joints, burden, and traces. If the signal is present but low, check whether primary current reached the intended condition, whether another branch is loading the signal, and whether a clamp or abnormal input impedance is limiting it.
Do not judge the component from amplitude alone
Loaded-waveform shape can be influenced by inductance, the burden path, front-end parts, PCB coupling, and the primary-current waveform. Droop, edge distortion, or clipping does not automatically mean the transformer is damaged. Confirm the input, then the burden and downstream stages, and finally use a controlled replacement comparison to narrow the cause.
5. WHPT-EE050-009 Parameters Relevant to Testing
The WHPT-EE050-009 values help select the right inspection and measurement method. Each parameter answers a different question about installation, resistance, signal scaling, or insulation; none should be treated as a stand-alone pass or fail result.
| Check | WHPT-EE050-009 value | How to use it |
|---|---|---|
| Product and size | WHPT-EE050-009; EE5 | Confirm the installed product, PCB footprint, orientation, and nearby clearance. |
| L | 2000 µH | Use it as a design reference and assess waveform transfer under controlled loaded conditions. |
| Maximum current | IR(A) Max 20 A | Treat it as a product-selection boundary, not a universal continuous-current rating or protection threshold. |
| Turns ratio | 1:100 | Check whether the secondary signal follows primary current; output voltage also depends on the burden and front end. |
| DCR1 | 0.75 mΩ max | Use four-wire measurement for meaningful accuracy; an ordinary meter mainly screens for an obvious open. |
| DCR2 | 5500 mΩ max (5.5 Ω) | Account for surrounding paths during in-circuit testing and isolate one connection if necessary. |
| Isolation | 1000 VAC | Match the insulation parameter to system requirements; do not treat it as normal working voltage. |
Continuity, DCR, and the loaded waveform should support the same diagnosis. Continuity finds an obvious open, DCR screens for abnormal resistance, and the loaded waveform shows whether current transfer and the surrounding signal path operate together.
6. Separate Transformer Faults from Front-End Circuit Faults
No waveform: trace the signal path in order
Confirm primary current first, then check the secondary winding, solder joints, burden, and controller input. If the symptom remains after a controlled transformer replacement, focus on PCB continuity and the surrounding parts.
Low amplitude: verify that the primary condition is the same
Observe primary current and the sampling node under the same operating condition. Low primary current points back to the power stage. Normal primary current with a heavily reduced sample calls for checks of the burden, parallel paths, and downstream clamps.
Nuisance trips and intermittent signals: inspect noise and connections
For nuisance triggering, compare switching noise, the sensing reference, filtering, and the controller threshold. An unwanted pulse can be introduced after the transformer. Intermittent signals deserve another close look at solder joints, vias, and copper traces for movement-sensitive connections.
7. Frequently Asked Questions (FAQ)
How do I test a current transformer?
With power removed, inspect the component, solder joints, and winding continuity. Measure DCR with the appropriate method, then restore the complete burden circuit and apply repeatable primary current while observing the actual sampling node. These results together separate a component fault from a circuit fault.
Is a continuity beep enough to prove that the transformer is good?
No. A beep only screens for a fully open path. It cannot confirm DCR accuracy, turns ratio, dynamic transfer, or correct operation with the burden and signal-conditioning circuit.
Why is the WHPT-EE050-009 primary DCR difficult to measure?
Its DCR1 limit is 0.75 mΩ, which can be below the lead and contact resistance of an ordinary handheld meter. Use a micro-ohmmeter or four-wire Kelvin method when an accurate result is required.
Does no secondary waveform mean that the transformer has failed?
Not necessarily. Confirm primary current, the burden connection, solder joints, PCB continuity, clamp behaviour, and the chosen probe point before replacing the transformer.
Can another 1:100 current transformer be used as a direct replacement?
Not from ratio alone. Compare the maximum-current value, inductance, DCR, isolation, size, and footprint, then verify the loaded waveform with the actual front end.
8. Conclusion
When a current-sense signal is missing, low, or unstable, a useful sequence is to confirm primary current and assembly quality, check winding continuity and DCR, and then inspect the waveform with the complete burden circuit connected. For the WHPT-EE050-009, the sub-milliohm primary DCR is not suited to precise measurement with an ordinary handheld meter, while the 5.5 Ω secondary DCR limit must be interpreted with the installed circuit in mind. A staged check reduces unnecessary replacement and gives a clearer basis for product selection and prototype validation.
This article was prepared by the technical engineering team at Suzhou VOOHU Electronic Technology Co., Ltd. (VOOHU).