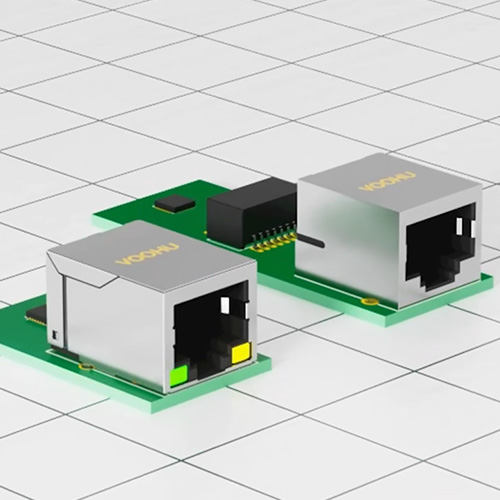

Ethernet Port Dead After a Lightning Strike or Surge Test: Is It the LAN Transformer or the PHY? | VOOHU
Ethernet Port Dead After a Lightning Strike or Surge Test: Is It the LAN Transformer or the PHY? | VOOHU
An outdoor camera or industrial gateway takes a lightning hit, or a board has just been through a 4 kV surge test in the lab, and now one Ethernet port is not working: the LEDs stay off, the link will not come up, or it only runs at 100 Mbps. From the connector inward, the board has: the RJ45; the gas discharge tube (GDT) and Bob Smith termination on the line side of the transformer; the LAN transformer (or an RJ45 with integrated magnetics, called a MagJack below); and then the ESD diodes and the PHY. Which part do you replace first? The usual reflex is “the transformer is closest to the cable, so it took the hit” — swap the transformer, and if that does not help, scrap the board.
Two assumptions get in the way. First, a dead port after a surge does not necessarily mean the transformer failed: windings are rarely burned open by a surge, while the PHY-side ESD diodes and the PHY front end are more fragile. Second, a port that still links is not necessarily undamaged — several kinds of damage do not affect data at all. This article gives a power-off method that measures each side of the transformer separately with a multimeter, an LCR meter and an insulation tester, using pass/fail values from VOOHU’s published LAN transformer and MagJack specifications wherever possible. About ten minutes on the line side is usually enough to narrow the fault to the line side, the isolation barrier or the PHY side.
1. The Short Answer: Measure Before You Replace
A surge can take roughly three paths into the port. A common-mode surge (all eight wires together against earth) puts its voltage across the transformer’s primary-to-secondary isolation and the Bob Smith high-voltage capacitor. What actually dumps the energy is the line-side GDT to chassis. The 1 nF Bob Smith capacitor stores only about 8 mJ at 4 kV, so it absorbs very little and is often the part that gets damaged. A surge between different pairs is still common-mode to each winding: the current flows through the center taps and the 75 Ω termination resistors, which is a common way those resistors burn open. Only a differential surge between the two wires of the same pair couples through the transformer to the PHY side, where it lands on the ESD diodes and the PHY front end. A common-mode surge can also reach the PHY side if it flashes over the isolation barrier or the PCB isolation gap, or if pair imbalance converts part of it into a differential surge.
Several of VOOHU’s protection articles place surge damage on the PHY side.How to Choose an ESD Protection Diode for an Ethernet Portexplains that if the GDT does not fire first, the ESD diode behind it punches through, and the symptom is “a port that goes dead after the first surge test.” The10/100BASE-TX protection articlesays a surge can punch through the PHY transceiver front end and leave the port “deaf.” TheIP camera port design articledescribes returned units with the PHY or port area scorched black.
So why measure the transformer first? Because it is the fastest check: measuring the resistance across each pair on the RJ45 side and on the PHY side rules out an open winding in a few minutes. Thegigabit port troubleshooting guidesays “do not rush to swap the PHY — the problem is very likely in the port magnetics,” but that advice is about design pitfalls such as a wrong part number, excessive leakage inductance or a mis-wired center tap or termination. It does not carry over to surge damage. Sometimes the isolation breaks down first and both sides are damaged, so even after you find a bad PHY, check the isolation too. The six common failure modes after a surge are:
| What failed | Port symptom | How to find it |
|---|---|---|
| PHY-side ESD diode shorted | No link, or one bad pair forces gigabit down to 100 Mbps | That pair reads much lower to ground than a good port; normal again after the ESD diode is removed |
| PHY transceiver front end damaged | No link, downshift or packet loss; the chip runs hot | ESD diodes and transformer are fine, but the PHY MDI pins read differently from a good port |
| Transformer winding or solder joint open | No link, or 100 Mbps only | Open across a pair on the line side or PHY side (a good winding reads about 1 Ω) |
| Line-side GDT or TVS shorted | A TVS across a pair kills that pair; a short to chassis may still link | GDT/TVS to chassis shorted: pair-to-chassis reads near 0 Ω or about 75 Ω. TVS across a pair shorted: the pair may read only slightly lower than a good port; disconnect the TVS and re-measure |
| Bob Smith capacitor shorted or resistor open | Still links | Capacitor shorted: pair-to-chassis about 75 Ω (should be open). Resistor open: pair-to-pair goes from about 150 Ω to open |
| Isolation degraded (primary to secondary) | Usually still links | Disconnect the GDT; with a 500 VDC insulation tester, line side to PHY side reads below 2 MΩ or far below a good port |
Sections 2 to 4 cover how to measure. Sections 5 to 7 cover three common pitfalls in reading the results.
2. Step One: Power Off and Measure the Line Side from the RJ45
On a discrete transformer you can probe the line-side pins directly. On a MagJack the line side is inside the housing, so measure from the RJ45 contacts. The easiest way is to cut a short patch cable (30 cm or less) and strip the eight conductors as test leads. Before measuring winding resistance, short the two conductors of one pair at the stripped end and record that reading as your zero. The values below assume a gigabit, non-PoE design with Bob Smith termination; always check against your own schematic.
| Test point | Instrument | Normal reading | If abnormal |
|---|---|---|---|
| Across each pair: 1-2, 3-6, 4-5, 7-8 | Multimeter | About 1 Ω, all four pairs similar | Open: broken winding or joint. Clearly high: check solder joints |
| Between pairs, e.g. pin 1 to pin 3 | Multimeter | About 150 Ω (two 75 Ω in series) | Open: a 75 Ω resistor may be burned open. Well below 150 Ω: a resistor is bypassed or the pairs are shorted together |
| Each pair to chassis (on a MagJack, the Bob Smith capacitor’s chassis pin) | Multimeter | Open (a high-voltage capacitor sits in between) | About 75 Ω: the capacitor, or a GDT/TVS in parallel with it, is shorted. Near 0: a GDT or TVS connected directly from the pair to chassis is shorted |
| All 8 line-side wires shorted together, to PHY-side ground and to chassis | 500 VDC insulation tester | ≥2 MΩ (IEEE 802.3); VOOHU’s wiring guide uses >10 MΩ for center tap to ground; good parts read far higher | Below 2 MΩ, or far below a good port: isolation degraded. Disconnect the GDT first (see Section 4) |
| Inductance of each pair | LCR meter (100 kHz, 100 mV) | Compare with a good port on the same board; off-board, ≥350 μH under datasheet conditions (with 8 mA bias) | Clearly low: usually shorted turns, which may not show up in DC resistance (see Section 6) |
Bob Smith termination works like this: the line-side center tap of each pair connects through a resistor of about 75 Ω to a common node, and that node goes to chassis through a high-voltage capacitor (typically 1 nF / 2 kV). So two pairs read about 150 Ω to each other (two 75 Ω resistors in series), and if the capacitor shorts, each pair reads about 75 Ω to chassis. Keep five points in mind:
First, a good transformer reads only about 1 Ω across pins 1-2 on the line side. It looks like a short, but it is normal. VOOHU’sHX1188NL cross-reference reportlists the winding resistance of theWHS16037TGas 1400 mΩ max, and theLAN transformer datasheet guidegives about 0.9 Ω or less per winding. If you read tens of ohms or more, suspect the winding or a solder joint.
Second, when test point 3 reads about 75 Ω, the capacitor, the GDT or a TVS could be the short; disconnect them one at a time to find out which. Third, a 10/100 port has only two windings (1-2 and 3-6); pins 4-5 and 7-8 are usually tied together and terminated through 75 Ω, so a near-0 Ω reading across them is normal; some designs leave them unconnected, in which case an open reading is also normal. Go by the schematic. Fourth, on a PoE port the line-side center taps connect to the rectifier bridge or the power circuit, so test points 2, 3 and 4 will all read differently; go by the schematic.
Fifth, if several ports on a multi-port part share one Bob Smith network, VOOHU’sPoE switch multi-port design articlenotes that this shared design often leads to “breaking one port and damaging the entire row” in surge testing. In that case, comparing with the neighboring port tells you nothing; check the schematic.
3. Step Two: Bad Readings on the PHY Side — ESD Diode or PHY?
Before you start, check the schematic to see which side of the transformer the ESD diodes are on. Designs differ: some put them on the line side, others on the PHY side. The steps below assume they are on the PHY side; if they are on the line side, treat them like the GDT and TVS and disconnect them one by one.
First, check the PHY-side windings: MDI+ to MDI- on each pair should also read about 1 Ω. Tens of ohms or more means the PHY-side winding or common-mode choke is open, which you cannot see from the RJ45 side.
Second, with power off, set the multimeter to diode mode, put the red probe on ground and the black probe on one wire of each PHY-side pair (the two wires of a pair are connected through the winding), and record the reading. Then measure a good port with the same mode and probe polarity and compare. With a voltage-mode PHY you are reading the diode drop of the ESD diode and the PHY pin. With a current-mode PHY, the PHY-side center tap is tied to the analog supply, and each MDI line reaches that rail both through the winding and through its 49.9 Ω termination. You are really reading the whole supply rail to ground, every pair reads about the same, and only a hard short will show. To see leakage on one pair, disconnect that pair’s center-tap supply and its 49.9 Ω terminations first. If one pair reads clearly low, suspect the ESD diode on that pair first — for example a low-capacitance ESD array such as theWHALD03G4U(3.3 V, 0.3 pF, DFN2510-10L).
Third, remove that ESD diode with hot air and measure again. If the reading returns to normal, the ESD diode failed: replace it with the same part, then power up, run traffic and check the error counters to make sure the PHY was not damaged too, and find out why the GDT did not fire first. If the reading is still low, check the other parts on that pair before blaming the PHY. With a voltage-mode PHY, the PHY-side center tap goes to ground through a 0.1 μF capacitor; if that capacitor is shorted, both wires of the pair read low to ground. With a current-mode PHY, check the 49.9 Ω terminations and the center-tap supply. Only when all of these are ruled out does a low reading mean the PHY pin is damaged internally.
Fourth, if every reading so far matches a good port, power up from a current-limited supply and check whether the PHY runs noticeably hotter than on a good board and whether the board draws more current than normal. Use MDIO to read the link status, link partner abilities and error counters. Reading the PHY ID only proves that the digital core and supply are alive; the analog front end can be damaged and the ID will still read correctly.
4. Step Three: Recheck Isolation with an Insulation Tester Without Being Misled
IEEE 802.3 Clause 14.3.1.1 (referenced for 1000BASE-T in Clause 40.6.1.1) requires the isolation between all MDI leads and frame ground and other accessible conductors to pass one of three tests: 1500 Vrms at 50/60 Hz for 60 s; 2250 VDC for 60 s; or ten 2400 V, 1.2/50 μs impulses of alternating polarity at intervals of at least 1 s. After the test, insulation resistance measured at 500 VDC must be at least 2 MΩ. For repair work, use the 2 MΩ limit as a floor: short all eight line-side wires together and measure with a 500 VDC insulation tester to PHY-side ground and to chassis. A reading below 2 MΩ is a definite fail. A reading above 2 MΩ but several orders of magnitude below a good port should also be treated as degraded.
If the line side has a GDT and chassis ground is connected to PHY-side ground (directly, or through a resistor or capacitor), the GDT will fire as soon as the tester applies 500 V. TheWHGD090V1P0BGDT on VOOHU’s site has a DC breakdown of only 90 V, and the 200 V and 400 V versions are also below 500 V. The reading will be very low and look like a failed transformer. VOOHU’shi-pot test articlemakes the same point about GDTs causing false failures. Before measuring, disconnect the GDT, any TVS, and the link between chassis ground and PHY ground. The Bob Smith capacitor is also in this path, so check it too if the reading is low.
MagJacks with built-in surge protection, such as theSYT111Q303AB2A1DFL(marked “+SPD” in the selection table), contain protection parts inside. Do not apply the 2 MΩ criterion blindly; check the internal schematic and datasheet first.
Do not run a full 1500 Vrms or 2250 VDC hi-pot on a suspect board before it is repaired; it can finish off insulation that is already degraded. Passing a 500 V insulation test only rules out a severe breakdown; it does not prove the barrier can still withstand 1500 V. During repair, replace the transformer and the Bob Smith capacitor, and inspect the area under the transformer and the isolation gap with a magnifier for arc marks or carbon tracking — PCB damage like that cannot be fixed by replacing parts. If a repaired board is going back to the field, disconnect the GDT and repeat the production hi-pot to confirm the whole barrier is restored.
5. Pitfall 1: A Port That Still Links Can Still Be Damaged
The Bob Smith termination hangs on the line-side center taps. It gives common-mode current a path to chassis, but it is not in the differential signal path. The same goes for the isolation between primary and secondary: unless it is fully shorted, differential signals still pass. So the port links and pings normally in all three of these cases: a 75 Ω resistor burned open; the Bob Smith capacitor shorted; or a leakage path between primary and secondary.
The consequences differ. An open 75 Ω resistor disables the common-mode termination and erodes both the emissions margin and the immunity margin. A shorted capacitor or primary-to-secondary leakage means the line side is no longer properly isolated from chassis or from the PHY side: the board will fail the production hi-pot, and the next surge can more easily break through that weakened path to the PHY side. So even if the port still works after a surge test, measure the termination and isolation as described in Sections 2 and 4.
6. Pitfall 2: Low On-Board Inductance Does Not Mean a Bad Transformer
Many engineers measure each pair’s inductance from the RJ45 with an LCR meter and compare it with the 350 μH in the datasheet. For example, VOOHU’s gigabit MagJackSYT-320DNLis specified at OCL ≥350 μH (100 kHz, 100 mV, 8 mA DC bias). The catch is that on the board, the PHY-side winding may have a load across it. VOOHU’svoltage-mode vs current-mode PHY guidestates that a current-mode PHY needs a 49.9 Ω termination on each line, about 100 Ω across the pair.
Do the math: at 100 kHz, 350 μH has a reactance of about 220 Ω. In parallel with 100 Ω, an LCR meter in series mode reads about 60 μH and 83 Ω — one sixth of the specified minimum. In other words, on a board with a current-mode PHY, a perfectly good transformer can look as if its inductance is far too low. A voltage-mode PHY usually has no external termination, but the impedance the chip presents when unpowered varies by vendor, so the datasheet value cannot be applied directly there either.
If you need an on-board inductance reading, switch the LCR meter to parallel mode (Lp-Rp). The roughly 100 Ω across the winding goes into Rp, and Lp comes back close to the winding’s own inductance. Without the 8 mA bias the reading will be higher than under datasheet conditions, so the most reliable approach is still to compare with a good port on the same board under the same conditions, or to remove the part and test it under datasheet conditions. Clearly low inductance with normal DC resistance usually means shorted turns caused by the surge breaking down the magnet-wire insulation — exactly what the LCR check is there to catch.
7. Pitfall 3: Gigabit Drops to 100 Mbps — Check Pairs 4-5 and 7-8 First
100BASE-TX uses only pairs 1-2 and 3-6; gigabit uses all four pairs. If the gigabit PHY supports and enables downshift, a problem on pair 4-5 or 7-8 makes it fall back to 100 Mbps; a PHY without downshift simply fails to link. So the symptom “only 100 Mbps after a lightning strike” already narrows the search.
Work in this order. First, swap in a known-good cable and a known-good link partner to rule out the cable and the far end; the same strike can damage them too. Next, check the transformer windings for pairs 4-5 and 7-8, and the ESD diodes on those two pairs on the PHY side (PHY datasheets usually call them pairs C and D, or MDI2 and MDI3). If those are fine, go back and check the ESD diodes on pairs 1-2 and 3-6 for slight leakage. Gigabit needs far more signal-to-noise margin than 100 Mbps, so minor damage can leave a pair good enough only for 100 Mbps.
TheJL2101C-NIgigabit PHY from JLSemi (VOOHU is a JLSemi distributor) has a built-in cable diagnostics function. It is worth running first, but if the PHY front end itself is damaged, the diagnostics will also report a fault, so do not use them alone to blame the cable or the transformer.
8. After the Repair: Should You Move to a Higher-Isolation Transformer?
1500 Vrms is a production withstand test level, not a breakdown voltage, so you cannot simply say “a 4 kV surge will always break through a 1500 V transformer.” Of the 149 LAN transformers in VOOHU’s selection table, 140 are rated 1500 Vrms. Whether a 1500 V transformer survives a surge depends mainly on whether the line-side GDT fires first. For example, theWHGD090V1P0Bhas a rated impulse spark-over of 600 V, below the roughly 2.1 kV peak that corresponds to 1500 Vrms. Once the GDT fires, it clamps the line side to chassis; the voltage across the isolation barrier is limited only if the chassis has a low-impedance path to earth or to the PHY-side ground. If the chassis floats, the GDT firing does not protect the isolation. A separate Bob Smith network per port is a different matter: it stops one damaged port from taking out the whole row. So when a surge does damage, first check that the protection is in place, then consider higher isolation.
If you do need higher isolation, look for a higher-isolation version in the same family first. For example, the gigabit 24-pinWHSG24701Gis rated 1500 Vrms, 0 to 70 °C. In the same family, theWHSG24701-2KGis rated 3000 Vrms, 0 to 70 °C, and theWHSG24701F0is rated 4000 Vrms, -40 to 85 °C, with PoE+ support up to 720 mA. For outdoor PoE ports, the F0 is the better fit. Before changing parts, check the land pattern, pinout and withstand test conditions in the datasheets.
For 10/100, theWHS16037TG(1500 Vrms, -40 to 85 °C) has a same-footprint sibling, theWHS16037-2KG; both product pages state that the outline and land pattern are identical. But the 2KG’s 2500 VAC rating is a 1 mA, 2 s test, while the standard part’s 1500 VAC is 1 mA for 60 s, and the product page says the two cannot be compared on voltage alone. Its operating temperature range also narrows to 0 to 70 °C, so it is not a surge-hardening upgrade for an outdoor 10/100 port.
Replacing the transformer alone is not enough. The isolation test also stresses the Bob Smith capacitor (typically 2 kV) and the PCB creepage from the line side to ground and to the PHY side. If the transformer goes to 3 kV or 4 kV but the capacitor and PCB stay the same, they will be the first to break down next time.
9. Repair Checklist (10 Items)
Work from top to bottom: item 1 records the symptom, items 2 to 6 check the line side and isolation with power off, items 7 and 8 check the PHY side, and items 9 and 10 are the post-repair checks. For lab prototypes, repeat a surge test at the same level after the protection is changed; for field returns, re-measuring and running traffic to confirm no downshift is enough — there is no need to surge them again.
| No. | Check | How |
|---|---|---|
| 1 | Symptom on the failed port | Record link, speed and LEDs; one port or a whole row; same result with a good cable and a good link partner? |
| 2 | Transformer windings | Multimeter across 1-2, 3-6, 4-5 and 7-8 on the line side and MDI+ to MDI- on each PHY-side pair; about 1 Ω and similar |
| 3 | Bob Smith resistors | Measure between pairs; about 150 Ω in a non-PoE design |
| 4 | Bob Smith capacitor | Pair to chassis (on a MagJack, to the capacitor’s chassis pin); should be open, about 75 Ω means shorted |
| 5 | Line-side protection | Disconnect the GDT and TVS one at a time to find any short |
| 6 | Isolation | Disconnect the GDT and the chassis-to-ground link; 500 VDC from line side to PHY ground and to chassis; ≥2 MΩ and close to a good port |
| 7 | PHY-side ESD diodes | Diode mode, pair by pair against a good port; re-measure after removal |
| 8 | PHY | Current-limited power-up; check temperature and current; read link status and error counters over MDIO (a valid ID does not prove the front end is good) |
| 9 | Protection design | Does the GDT fire first? Separate Bob Smith network per port? Enough capacitor rating and creepage? |
| 10 | After repair | Re-check items 2 to 8 and run traffic to confirm no downshift; repeat the surge test on prototypes |
10. FAQ
Q1: The port still works after a lightning strike. Do I need to do anything?
Measure it. A shorted Bob Smith capacitor, an open termination resistor or degraded isolation will not affect data, but they leave the isolation out of spec and reduce EMC margin. Multimeter readings between pairs and from each pair to chassis will reveal an open resistor or a shorted capacitor; degraded isolation needs a 500 VDC insulation tester with the GDT disconnected.
Q2: My multimeter reads only a fraction of an ohm across pins 1-2. Is it shorted?
Usually not. Each winding is only about 1 Ω — theWHS16037TG, for example, is 1400 mΩ max. But if the line side has a TVS across the pair and it has failed short, it also reads near 0 and is hard to tell from a good winding; compare with a good port or disconnect the TVS and measure again. The real faults are an open reading or one pair reading clearly higher than the others.
Q3: The device has only one port. What do I compare against?
Use a known-good board of the same model and measure the same point with the same range and probe polarity. The line-side DC readings can also be checked directly against the schematic: about 1 Ω across a pair, about 150 Ω between pairs, open from pair to chassis.
Q4: The insulation reading is very low, and it stays low after replacing the transformer. Why?
The leakage is not in the transformer. The most common cause is a line-side GDT or TVS conducting at 500 V; next come a leaky Bob Smith capacitor, a Y capacitor across the isolation in the PoE circuit, or a PCB isolation gap carbonized by an arc. Disconnect the GDT, TVS and Bob Smith capacitor and measure again. If you must measure with the GDT in place, use a test voltage below its DC breakdown, and only compare the reading with a good port — the 500 VDC / 2 MΩ criterion no longer applies.
Q5: A multi-port switch lost a whole row of ports at once. Is it a bad batch of transformers?
First check whether the failed row is driven by the same multi-port PHY or switch chip: a surge entering one port can damage that chip and take every port on it down. Then check the termination design: if several ports share one Bob Smith capacitor or one common node, surge energy spreads from port to port and a whole row fails together. Each port should have its own termination network with a single-point connection to chassis.
Q6: The transformer inside a MagJack has failed. Can I replace just the transformer?
No. The transformer is sealed inside the RJ45 housing, so the whole part has to be replaced — with the same part number, or with a part whose datasheet confirms a compatible footprint, pinout and LEDs. You can measure the removed part from its jack contacts using the method in Section 2 to confirm it really was the failure.
Need Samples or Technical Support?
If you have Ethernet boards returned after a surge or lightning event, send us the schematic, the symptoms and your measurements. VOOHU FAEs can help you work out whether the fault is in the transformer, the termination or the PHY side, and recommend LAN transformer and MagJack samples with the right isolation rating.
——— VOOHU Engineering Team
Technical support: fae.thorne@voohu.cn | Tel: 400-1048-018
Suzhou VOOHU Electronic Technology Co., Ltd. | www.voohuele.com